Sunday, August 28, 2011

Berry Trifle

It's the month of Ramadan, which always brings back a rush of happy memories with my family. If there's one thing we all love to do, it's EATING. So breaking fast together usually means having some special treats and loading up on some favorite foods. At a recent iftaari at the mosque, I decided to make a dessert that would not only look pretty, but would also be fresh and delicious. And, let's not lie - I was dying for an excuse to purchase a trifle bowl :)

This dish has so many layers of delicious flavors. I lucked out with the strawberries and blueberries - they were at the peak of season and were incredibly bright and sweet. The buttery pound cake lightly flavored with vanilla and almond extract was a great touch. I could easily see this being a huge hit at any summer BBQ. Enjoy!

Berry Trifle (adapted from Sunny Anderson's Recipe here)


Ingredients

1/4 cup plus 2/3 cup sugar
1/4 cup fresh lemon juice
1/4 teaspoon almond extract
1/4 teaspoon vanilla extract
1 pound cake, cut into 1-inch cubes
1 pound cream cheese, at room temperature
2 cups heavy cream, at room temperature
2 pints blueberries
2 pints strawberries, hulled and sliced

Directions


1. Heat 1/4 cup sugar, the lemon juice and 1/4 cup water in a saucepan over medium-high heat, stirring, until the sugar dissolves. Remove from the heat and stir in the almond and vanilla extracts. Dip the slices of pound cake on each side with the syrup. Cut the slices into 1-inch cubes.

2. Beat the remaining 2/3 cup sugar and the cream cheese with a mixer on medium speed until smooth and light. Add the cream and beat on medium-high speed until smooth and the consistency of whipped cream.

3. Arrange half of the cake cubes in the bottom of a 13-cup trifle dish. Sprinkle evenly with a layer of blueberries. Dollop half of the cream mixture over the blueberries and gently spread. Top with a layer of strawberries. Layer the remaining cake cubes on top of the strawberries, then sprinkle with more blueberries and top with the remaining cream mixture.

4. Finish with the remaining strawberries and blueberries, arranging them in a decorative pattern. Cover and refrigerate 1 hour.

Sunday, August 14, 2011

Chicken with Orzo, Spinach and Lemon

For me, there is a thrill that comes from cooking when I can open my pantry and my refrigerator and realize that I have the ingredients to make something truly delicious. Today's dinner was inspired by a box of orzo and some frozen spinach. Things started to get interesting when I realized I also had capers and chicken breasts. Bam! We have Chicken with Orzo, Spinach and Lemon, ladies and gentlemen.

I loosely based my meal on a recipe I found on Ciao Italia with Mary Anne Esposito, with some some slight changes. Enjoy!

Chicken with Orzo, Spinach and Lemon
Serves 4
30 minutes prep and cook time

Ingredients
1 1/2 cups orzo cooked according to package directions
1/2 cup extra virgin olive oil
One 10 ounce package frozen chopped spinach, thawed and well squeezed
4 skinless boneless chicken breast halves
1/4 cup flour
1/2 teaspoon fine sea salt
Grinding coarse black pepper
1/2 teaspoon red pepper flakes (optional - I like some heat!)
1/2 teaspoon garlic powder
2 tablespoons unsalted butter
2 tablespoons minced onion
2 tablespoons capers in salt, well rinsed and minced
1/2 cup white wine or sparkling apple cider
1/2 cup fresh lemon juice
2 tablespoons lemon zest
4 tablespoons fresh minced parsley (optional)
2/3 cup grated Parmigiano Reggiano cheese (I used mozzarella but would have preferred parmigiano)

Directions

1. Combine the orzo with 1/4 cup of the olive oil. Stir in 1/4 cup of the lemon juice. Salt to taste. Stir in the chopped spinach and 1/2 cup of cheese. Cover, set aside and keep warm. Or make ahead and reheat in the microwave when ready to serve.

2. Meanwhile, place each piece of chicken between two sheets of wax paper and use a meat pounder to thin them to about 1/4 inch thickness. Mix the flour, salt and pepper together in a bag and place each breast into the flour mixture, coating well on both sides and shaking off the excess. Set aside.

3. Heat the remaining olive oil in a large non stick skillet and brown the chicken, adding more olive oil as needed. Transfer them to a dish as they brown, and set aside. However, do not stack the breasts on top of each other, as they get soggy.

4. Add the butter to the pan and stir in the onion; cook until the onion wilts down, about 3 minutes. Add the capers and cook 1 minute. Stir in the wine or cider, raise the heat to high and cook 3 minutes, stirring frequently. Stir in lemon juice and zest and cook over medium heat until the sauce thickens slightly.

5. Return the chicken cutlets to the pan and heat gently until hot. Make a bed of the orzo mixture on a serving platter. Place the chicken breasts over the orzoand pour the sauce over the top. Sprinkle on the remaining cheese and parsley, and serve.

Monday, July 18, 2011

Panko-Crusted Salmon with Roasted Asparagus

First off, my apologies for not updating this more often. I've been so busy with life that I haven't had much time to try new recipes. Thankfully, I will be getting a brand spankin' new camera in two days, and I'm hoping to take some more time out to test-drive a few concoctions I have up my sleeve. Stay tuned!

I've also been trying to eat healthier, so I decided to try my hand at cooking fish (not always my first choice) and asparagus (something I love to order out, but have never tried to cook at home). I'm much more likely to turn to panko than regular old flour to get that textured, crunchy taste I love. So, I thought this recipe was perfect! The salmon was cooked perfectly and tasted absolutely heavenly. The asparagus went a little mushy - my fault for not realizing they would cook just fine in less than 10 minutes, even if it initially appear to be the case.

Best of all, this meal was low carb, heart healthy (yay for omega 3's!), and took less than 30 minutes to prepare, with minimal prep time. Works for me!


Panko Crusted Salmon:
Prep time: 10 minutes
Cook time: 12 minutes

Ingredients
4 teaspoons olive oil
4 pieces thickly cut, boneless salmon (each 6 oz) (try to purchase fresh instead of frozen!)
Salt and pepper to taste
2 Tbsp honey mustard
2 teaspoons chopped fresh thyme (or 1 tsp dried)
2/3 cup panko bread crumbs
2 Tbsp chopped Italian parsley
1/2 teaspoon Hungarian sweet paprika

Method
1. Preheat the oven to 400°F. Set the salmon on a foil-lined baking sheet skin side down. Sprinkle with salt and pepper.
2. In a small bowl, combine the honey mustard and 1 teaspoon of the thyme. In another small bowl, mix the panko with the remaining 1 teaspoon of thyme, 4 teaspoons of olive oil, parsley, and paprika. Add salt and pepper (a light sprinkle).
3. Using a small spoon, spread the mustard mixture on the salmon; top with the bread crumb mixture.
4. Roast the salmon for 12-14 minutes (test at 10) or until it is almost completely firm to the touch and flakes when poked with a fork. Serve at once.

Yield: Serves 4.


Cook time: 10 minutes

Note: I added a little freshly grated Parmesan cheese for an extra touch.

Ingredients

1 lb asparagus spears (thick spears are best for roasting)
1-2 Tbsp olive oil2 cloves garlic, minced
Kosher Salt
Freshly grated black pepper
Lemon juice
roasted-asparagus-1.jpg roasted-asparagus-2.jpg
Method
1. Preheat oven to 400°F. Rinse clean the asparagus. Break the tough ends off of the asparagus and discard.
2. Lay the asparagus spears out in a single layer in a baking dish or a foil-covered roasting pan. Drizzle olive oil over the spears, roll the asparagus back and forth until they are all covered with a thin layer of olive oil. (Alternatively you can put the asparagus and oil in a plastic bag, and rub the bag so that the oil gets evenly distributed.) Sprinkle with minced garlic, salt, and pepper. Rub over the asparagus so that they are evenly distributed.
3. Place pan in oven and cook for approximately 8-10 minutes, depending on how thick your asparagus spears are, until lightly browned and tender when pierced with a fork. Drizzle with a little fresh lemon juice before serving.

Yield: Serves 4.

Sunday, December 26, 2010

Curry Chicken Pot Pie

Oh the weather outside is frightful,
But the fire is so delightful,
And since we've no place to go,
Let It Snow! Let It Snow! Let It Snow!

The blizzard outside today was a perfect excuse to try a new comfort food recipe - chicken pot pie. I just finished my second helping and it was EXACTLY what the doctor ordered. Creamy, spicy, flaky, and delicious all around. My recipe is based on the one I found here, with some tweaks:

Curry Chicken Pot Pie
Prep time: 15 minutes
Cook time: 30-40 minutes
Serves: 4

Ingredients

Crust
1 box Pillsbury® refrigerated pie crusts, softened as directed on box

Filling
1/3 cup butter or margarine
1/2 cup chopped onion
1/2 cup chopped celery
1 tablespoon minced garlic
2 lbs chicken breast, cut into small chunks
2 cups frozen mixed vegetables, thawed (corn, chopped carrots, and peas, and whatever else you'd like!)
1/3 cup all-purpose flour
1 teaspoon salt
1 teaspoon pepper
1 teaspoon curry powder
1 teaspoon red curry powder
1 teaspoon red chili flakes
1 3/4 cups vegetable or chicken broth
1/2 cup milk

Instructions:
1. Heat oven to 425°F. Make pie crusts as directed on box for Two-Crust Pie using 9-inch ungreased pie pan.

2. In a boiling pan, add frozen veggies and chicken and allow to cook until chicken is no longer pink, about 5-8 minutes. You can shred the chicken if you'd like, or keep cubed.

3. Meanwhile, a medium-sized saucepan, melt butter over medium heat. Add onion, celery, and garlic; cook 2 minutes, stirring frequently, until tender. Stir in flour, salt, pepper, and all other spices until well blended. Gradually whisk in broth and milk, cooking and stirring until bubbly and thickened.

4. Drain chicken and mixed vegetables and add into saucepan. Remove from heat. Spoon chicken mixture into crust-lined pan. Top with second crust; seal edge and flute. Cut slits in several places in top crust.

5. Bake 30 to 40 minutes or until crust is golden brown. Let stand 5 minutes before serving. Enjoy!


Sunday, December 5, 2010

Healthy Chicken Pesto Pasta - Creamy and Rich!

I remember when I first started cooking I was sooo particular about following the directions to a "T". However, after experimenting and discovering some great and exciting combinations of food, it's fun to open my pantry and refrigerator and dream up a new concoction. Especially when it actually tastes GOOD!

Tonight I had a hankerin' for pesto chicken, but didn't want to go too crazy on the calories and fat intake. I used yoghurt to give it a cre
amy texture and used minimal amounts of oil without sacrificing taste at all.

Healthy Chicken Pesto Pasta
Serves: 2 (can be easily doubled)
Prep Time: 10 minutes
Cook Time: 15-20 minutes

Ingredients:
  • 8 oz chicken breast - cut into strips or chunks, seasoned with salt, pepper, and Adobe seasoning (if available)
  • 1/2 serving of whole wheat pasta (penne or linguine works well, I used egg noodles that I had handy)
  • 2-3 tablespoons pesto (jar is fine)
  • half an onion
  • 1 cup mushrooms
  • 1 cup yoghurt
  • 1 tsp lemon juice
  • 2-3 cloves of garlic
  • olive oil
  • red pepper flakes
  • grated parmesan cheese
  • salt and pepper
Directions:

1. Cook pasta as directed. Be sure to check the pasta before draining - whole wheat tends to take an extra minute to fully cook.

2. Meanwhile, in a small bowl, combine the pesto and lemon juice with yoghurt and mix well. Set aside.

3. In a nonstick pan set to medium high, add 1 tsp. of olive oil, the mushrooms and onions. Saute until onions are caramelized and mushrooms soften - about 5 minutes. When this is close to being cooked, add the garlic and allow to simmer for 1 minute. Remove from pan and combine with the bowl of pesto.

4. Using the same pan, add in chicken to cook until no longer pink. More olive oil can also be added if needed.

5. Once cooked, take chicken off heat and add pasta and pesto mix. Combine well, top with salt & pepper to taste. Top with red pepper flakes and parmesan cheese and voila! Dinner is served :)

Saturday, September 11, 2010

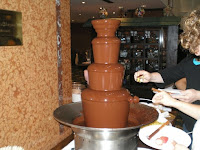
The Chocolate Bar aka My Idea of Heaven

Looking for a unique place to take family or friends visiting Boston? I would highly recommend the Chocolate Bar at Langham Hotel. The hotel is exquisite, service is top notch, and you leave feeling absolutely decadent. My friends and I have made this a girl's Saturday lunch for a number of years, they have a different theme each year, and the food is always creative...we even went here for Jen's bachelorette party (followed by a day at the spa - can life GET any better!?)

Hurry though - this slice of decadence only happens on Saturdays, from September 11-June 25 and reservations can fill up!

For more information: http://boston.langhamhotels.com/restaurants/chocolate_bar.htm


Saturday, September 4, 2010

Cupcakes, cupcakes, cupcakes!

These are hands down my favorite baked good (and trust me, I have a LOT of favorite baked goods). This recipe (based on one provided by the fabulous Mamma Joy) reminds me of a super moist cake slash cheesecake. The combination is spot on, and I love watching people bite into the cupcake and be so pleasantly surprised by the cheesecakey chocolate chip center. Make this if you want to be the best mom on the block or simply be ultra decadent. I last made these for my coworkers as a Holiday gift and it went over incredibly well!

Cream-Cheese Filled Chocolate Chip Cupcakes
3 Cups Flour
2 Cups Sugar
½ Cup Cocoa Powder
2 Teaspoon Baking Soda
1 Teaspoon Salt
2 Cups Water
2/3 Cup Vegetable Oil
2 Tablespoon Vinegar
2 Tablespoon Vanilla
1-8 ounce Cream Cheese {softened}
1- Egg
1-1/3 Cups Sugar
1-Cup Chocolate Chips
Pinch of Salt

Directions:
1. Preheat at oven to 350 degrees. Line 36 muffin cups with liners.

2. In a mixing bowl, stir together flour, sugar, cocoa powder, baking soda and salt.

3. Stir in water, vegetable oil, vinegar and vanilla. Fill paper liners half full.

4. In a separate bowl make the filling: Beat together cream cheese, egg, 1 cup of the sugar, salt, and chocolate chips.

5. Spoon one heaping tablespoon filling on top of each cupcake.

6. Sprinkle each with ½ teaspoon sugar. Bake 30 minutes.

Use Glad Freezer Bags to freeze ahead: These cupcakes freeze very well for up to 2 months.