Sunday, December 26, 2010

Curry Chicken Pot Pie

Oh the weather outside is frightful,
But the fire is so delightful,
And since we've no place to go,
Let It Snow! Let It Snow! Let It Snow!

The blizzard outside today was a perfect excuse to try a new comfort food recipe - chicken pot pie. I just finished my second helping and it was EXACTLY what the doctor ordered. Creamy, spicy, flaky, and delicious all around. My recipe is based on the one I found here, with some tweaks:

Curry Chicken Pot Pie
Prep time: 15 minutes
Cook time: 30-40 minutes
Serves: 4

Ingredients

Crust
1 box Pillsbury® refrigerated pie crusts, softened as directed on box

Filling
1/3 cup butter or margarine
1/2 cup chopped onion
1/2 cup chopped celery
1 tablespoon minced garlic
2 lbs chicken breast, cut into small chunks
2 cups frozen mixed vegetables, thawed (corn, chopped carrots, and peas, and whatever else you'd like!)
1/3 cup all-purpose flour
1 teaspoon salt
1 teaspoon pepper
1 teaspoon curry powder
1 teaspoon red curry powder
1 teaspoon red chili flakes
1 3/4 cups vegetable or chicken broth
1/2 cup milk

Instructions:
1. Heat oven to 425°F. Make pie crusts as directed on box for Two-Crust Pie using 9-inch ungreased pie pan.

2. In a boiling pan, add frozen veggies and chicken and allow to cook until chicken is no longer pink, about 5-8 minutes. You can shred the chicken if you'd like, or keep cubed.

3. Meanwhile, a medium-sized saucepan, melt butter over medium heat. Add onion, celery, and garlic; cook 2 minutes, stirring frequently, until tender. Stir in flour, salt, pepper, and all other spices until well blended. Gradually whisk in broth and milk, cooking and stirring until bubbly and thickened.

4. Drain chicken and mixed vegetables and add into saucepan. Remove from heat. Spoon chicken mixture into crust-lined pan. Top with second crust; seal edge and flute. Cut slits in several places in top crust.

5. Bake 30 to 40 minutes or until crust is golden brown. Let stand 5 minutes before serving. Enjoy!


Sunday, December 5, 2010

Healthy Chicken Pesto Pasta - Creamy and Rich!

I remember when I first started cooking I was sooo particular about following the directions to a "T". However, after experimenting and discovering some great and exciting combinations of food, it's fun to open my pantry and refrigerator and dream up a new concoction. Especially when it actually tastes GOOD!

Tonight I had a hankerin' for pesto chicken, but didn't want to go too crazy on the calories and fat intake. I used yoghurt to give it a cre
amy texture and used minimal amounts of oil without sacrificing taste at all.

Healthy Chicken Pesto Pasta
Serves: 2 (can be easily doubled)
Prep Time: 10 minutes
Cook Time: 15-20 minutes

Ingredients:
  • 8 oz chicken breast - cut into strips or chunks, seasoned with salt, pepper, and Adobe seasoning (if available)
  • 1/2 serving of whole wheat pasta (penne or linguine works well, I used egg noodles that I had handy)
  • 2-3 tablespoons pesto (jar is fine)
  • half an onion
  • 1 cup mushrooms
  • 1 cup yoghurt
  • 1 tsp lemon juice
  • 2-3 cloves of garlic
  • olive oil
  • red pepper flakes
  • grated parmesan cheese
  • salt and pepper
Directions:

1. Cook pasta as directed. Be sure to check the pasta before draining - whole wheat tends to take an extra minute to fully cook.

2. Meanwhile, in a small bowl, combine the pesto and lemon juice with yoghurt and mix well. Set aside.

3. In a nonstick pan set to medium high, add 1 tsp. of olive oil, the mushrooms and onions. Saute until onions are caramelized and mushrooms soften - about 5 minutes. When this is close to being cooked, add the garlic and allow to simmer for 1 minute. Remove from pan and combine with the bowl of pesto.

4. Using the same pan, add in chicken to cook until no longer pink. More olive oil can also be added if needed.

5. Once cooked, take chicken off heat and add pasta and pesto mix. Combine well, top with salt & pepper to taste. Top with red pepper flakes and parmesan cheese and voila! Dinner is served :)

Saturday, September 11, 2010

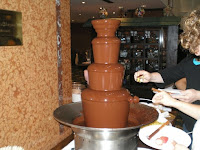
The Chocolate Bar aka My Idea of Heaven

Looking for a unique place to take family or friends visiting Boston? I would highly recommend the Chocolate Bar at Langham Hotel. The hotel is exquisite, service is top notch, and you leave feeling absolutely decadent. My friends and I have made this a girl's Saturday lunch for a number of years, they have a different theme each year, and the food is always creative...we even went here for Jen's bachelorette party (followed by a day at the spa - can life GET any better!?)

Hurry though - this slice of decadence only happens on Saturdays, from September 11-June 25 and reservations can fill up!

For more information: http://boston.langhamhotels.com/restaurants/chocolate_bar.htm


Saturday, September 4, 2010

Cupcakes, cupcakes, cupcakes!

These are hands down my favorite baked good (and trust me, I have a LOT of favorite baked goods). This recipe (based on one provided by the fabulous Mamma Joy) reminds me of a super moist cake slash cheesecake. The combination is spot on, and I love watching people bite into the cupcake and be so pleasantly surprised by the cheesecakey chocolate chip center. Make this if you want to be the best mom on the block or simply be ultra decadent. I last made these for my coworkers as a Holiday gift and it went over incredibly well!

Cream-Cheese Filled Chocolate Chip Cupcakes
3 Cups Flour
2 Cups Sugar
½ Cup Cocoa Powder
2 Teaspoon Baking Soda
1 Teaspoon Salt
2 Cups Water
2/3 Cup Vegetable Oil
2 Tablespoon Vinegar
2 Tablespoon Vanilla
1-8 ounce Cream Cheese {softened}
1- Egg
1-1/3 Cups Sugar
1-Cup Chocolate Chips
Pinch of Salt

Directions:
1. Preheat at oven to 350 degrees. Line 36 muffin cups with liners.

2. In a mixing bowl, stir together flour, sugar, cocoa powder, baking soda and salt.

3. Stir in water, vegetable oil, vinegar and vanilla. Fill paper liners half full.

4. In a separate bowl make the filling: Beat together cream cheese, egg, 1 cup of the sugar, salt, and chocolate chips.

5. Spoon one heaping tablespoon filling on top of each cupcake.

6. Sprinkle each with ½ teaspoon sugar. Bake 30 minutes.

Use Glad Freezer Bags to freeze ahead: These cupcakes freeze very well for up to 2 months.


Sunday, August 29, 2010

Best Spinach Artichoke Dip EVER!


If there is one appetizer I am most frequently asked to make/bring to a party, it's my Spinach Artichoke Dip. It's warm, ooey, gooey, and delicious! The dip tastes really fresh, doesn't cost much, serves PLENTY and takes 20 minutes (or less!) to make. I also use the low fat variation of everything to make this dip more health conscious. Enjoy!

Spinach and Artichoke Dip
1 box of frozen spinach
1/2 cup unsalted butter
1 lb. low-fat cream cheese at room temperature
5 cloves of minced garlic (adjust to your preference...I love the garlicky taste!)
1 13.5-oz. can artichoke hearts, drained and coarsely chopped
1 8-oz.carton low-fat sour cream
8 oz. shredded low-fat mozzarella cheese
1 large round sourdough loaf (1- to 2-lb. size)
Pita or Tortilla chips for dipping

1. Microwave the spinach per the box instructions. (usually 4 minutes on high). Be sure to place in a microwaveable bowl and cover.

2. Preheat the oven to 350F.

3. Melt the butter in a nonsuck skillet over medium-low heat. Squeeze excess moisture from the spinach by using a clean kitchen towel or cheesecloth, and add to the skillet.

4. Stir in the cream cheese and garlic, and continue stirring until the cream cheese has melted.

5. Fold in the artichoke hearts, sour cream and three-fourths of the mozzarella. Allow all of the cheeses to melt.

6. Meanwhile, cut the top off the bread loaf, and, using a sharp knife, cut out the interior. Slice it into cubes for dipping or save and make into croutons.

7. Pour the cheese mixture into the bread loaf, and put the loaf on a cookie sheet. Top with the remaining mozzarella, and cover with foil. Or, you can refrigerate the loaf until it's ready to serve.

8. Bake the stuffed bread for 25-30 minutes covered. Remove the foil, and bake for about 10-15 minutes uncovered, or until the cheese is hot and bubbly and looks like the top of pizza.

Monday, May 24, 2010

Best Foodie Gift: Food Network Magazine subscription

My best friend Johanna got me this for the holidays, and it’s the gift that keeps on giving. I love Food Network on any given day, and having their magazine helps me think of new recipes and also keeps me updated on what my favorites are doing. The magazine is CHOCK full of ideas, although not many are healthy. Despite that, it’s like recieving a new cookbook every month. I’ve saved all of them and they are in my bookshelf right next to the rest of my cookbooks. If you’re looking for an inexpensive gift for a foodie, I would highly recommend purchasing this!!


Tuesday, May 18, 2010

Annnnd, we're back!

I've decided to have Christmas in May. Mostly because I couldn't find my camera cord anywhere, and it's taken me this long to upload my photos. ahem...anyways, first up is a post on a fabulous new tradition we’ve started - Christmas gift swap and dinner.


The ladies and I decided to keep our get together low key and personal. Meghan C. kindly offered to host the event, and it was a GREAT success. Check out our festivities:


I volunteered to make the main dish - my first ever chicken roast. I used a Jamie Oliver recipe "Roast Chicken Recipe with Lemon and Rosemary Potatoes" mostly because he used the words ‘chuffed’ and 'some lovely fat'. I just couldn’t resist - I love anything British!


Jamie’s recipes always seem simplistic, but are flavorful and delicious. The technique of boiling the lemon with the potatoes and then transferring it into the cavity of the chicken really tenderized the meat and gave the potatoes a lemony hint that meshed well with the chicken. Some photos below.


Ingredients:

• 1 x 2kg/4½lb free-range organic chicken
• sea salt and freshly ground black pepper
• 2kg/4½lb potatoes, peeled
• 1 large, preferably unwaxed, lemon
• 1 whole bulb of garlic, broken into cloves
• a handful of fresh thyme
• olive oil
• a handful of fresh rosemary sprigs, leaves picked
• optional: 8 rashers of smoked streaky bacon

Directions:

Rub the chicken inside and out with a generous amount of salt and freshly ground black pepper. Do this in the morning if possible, then cover the chicken and leave in the fridge until you're ready to start cooking it for lunch or dinner. By doing this, you'll make the meat really tasty when cooked. Preheat your oven to 190ºC/375ºF/gas 5. Bring a large pan of salted water to the boil. Cut the potatoes into golf-ball-sized pieces, put them into the water with the whole lemon and the garlic cloves, and cook for 12 minutes. Drain and allow to steam dry for 1 minute (this will give you crispier potatoes), then remove the lemon and garlic. Toss the potatoes in the pan while still hot so their outsides get chuffed up and fluffy – this will make them lovely and crispy when they roast.

While the lemon is still hot, carefully stab it about 10 times. Take the chicken out of the fridge, pat it with kitchen paper and rub it all over with olive oil. Push the garlic cloves, the whole lemon and the thyme into the cavity, then put the chicken into a roasting tray and cook in the preheated oven for around 45 minutes. Remove the chicken to a plate. Some lovely fat should have cooked out of it into the roasting tray, so toss the potatoes into this with the rosemary leaves. Shake the tray around, then make a gap in the centre of the potatoes and put the chicken back in. If using the bacon, lay the rashers over the chicken breast and cook for a further 45 minutes, or until the chicken is cooked and the potatoes are nice and golden. (You can tell the chicken is cooked when the thigh meat pulls easily away from the bone and the juices run clear.)


Tuesday, February 16, 2010

Shopping Find - Aprons


Aprons - just another accessory I love to buy! I'm in love with all Jessie Steele aprons - they are just most definitely on my wish list (hint hint!):


And, this "Will Cook for Shoes" is adorable!


Monday, February 1, 2010

Grown-up Peanut Butter Cup

This chocolate pie literally tastes like a fancier Reese's Peanut Butter Cup, hence the name. The recipe is more time-intensive than other pies, but the end product is SO worth it. The layers of double ghiardelli chocolate, creamy almost cheesecake-like peanut butter and the crunchy homemade wafer crust makes it heavenly to bite into.

Trust me, this one's a winner. In fact, I made this in a Pie Bake-off at my new job and won first place! Here's the
link and the recipe is copied below. Enjoy!

INGREDIENTS
Chocolate Crust
4 ounces semisweet chocolate, chopped (1/2 cup)
1/2 stick unsalted butter, cut into tablespoons
8 ounces chocolate wafer cookies (from a 9-ounce package), finely ground (2 cups)

Peanut Butter Filling
8 ounces cream cheese, softened (1 cup)
1 cup chunky peanut butter
1/2 cup sugar
2 teaspoons pure vanilla extract
1 cup well-chilled heavy cream
3/4 cup salted roasted peanuts, chopped
Kosher salt

Chocolate Topping
4 ounces semisweet chocolate, chopped (1/2 cup)
1/2 cup heavy cream

DIRECTIONS

1. MAKE THE CHOCOLATE CRUST: Preheat the oven to 375°. In a medium glass bowl, combine the chocolate and butter and microwave at high power in 20-second intervals until the chocolate is melted. Stir well, then stir in the cookie crumbs. Press the cookie crumbs over the bottom of a 9-inch springform pan and 1 1/2 inches up the side. Bake the crust for 10 minutes, or until set; the crust will continue to firm up as it cools.

2. MEANWHILE, MAKE THE PEANUT BUTTER FILLING: In a large bowl, using a handheld electric mixer, beat the cream cheese with the peanut butter, sugar and vanilla extract until blended. In another large bowl, using the same beaters, whip the chilled cream until firm. Fold one-third of the whipped cream into the peanut butter mixture to loosen it, then fold in the remaining whipped cream and 1/2 cup of the chopped peanuts. Spoon the filling into the crust, smoothing the surface. Sprinkle lightly with salt and refrigerate until set, about 3 hours.MAKE

3. THE CHOCOLATE TOPPING: In a medium glass bowl, combine the chocolate with the heavy cream and microwave at high power in 20-second intervals until the chocolate is melted and the cream is hot. Stir the chocolate topping until blended, then let cool to barely warm, stirring occasionally.Spread the chocolate topping over the peanut butter filling and refrigerate until just firm, about 15 minutes. Sprinkle the remaining 1/4 cup of chopped peanuts around the edge of the pie. Carefully run a thin knife around the pie crust to loosen it, then remove the springform ring. Using a sharp knife, cut the pie into wedges. Run the knife under hot water and dry it between each cut.

MAKE AHEAD
The pie can be covered and refrigerated overnight. Garnish with the chopped peanuts before serving. Serve the pie chilled or slightly cooler than room temperature.

    Thursday, January 28, 2010

    New halal restaurant in Harvard Square

    Funny enough, I saw this tiny restaurant while coming home from Cardio Kickboxing just yesterday and thought it looked interesting. Today, I found a review on Boston.com that has me even more intrigued. I love middle-eastern food (especially shawarma and falafel), so this sounds right up my alley! Will have to report back once I try their food. If anyone else tries it, please let me know.

    In the meantime, here's some info:
    FALAFEL CORNER
    8 1/2 Eliot St., Harvard Square, Cambridge, MA
    617-441-8888. Cash only.
    Check out the review here.

    Prices are also really reasonable. Menu and prices here.

    Thursday, January 21, 2010

    Crunch Top Apple Pie


    Let me just put this out there...Paula Deen is my homegirl, and she can do NO wrong in the kitchen. I love her, despite all the butter that I'm convinced is going to give me a heart attack.

    I come from a huge Indian family, and a LARGE handful of my family got together to go apple picking over the Fall:

    Let's be honest...there's a whole lot of us. We had a lot of fun apple picking, check out my cousins Nawaz and Shabnam cheesing it up!
    Anyways, after we picked all these apples, we obviously needed to cook a pie with it! I tried Paula's recipe and it came out pretty yummy. The crunch top makes it extra special. Only thing I'd change is reduce the amount of apple sauce used by half (it was too gooey). I also won't judge anyone who uses premade pie crust (let's be honest here, kids!)


    Ingredients
    Dough and Filling:
    Dough for a double crust 9-inch pie (homemade, frozen, or refrigerated)
    3/4 cup sugar
    1 tablespoon all-purpose flour
    1 teaspoon ground cinnamon
    Dash salt
    3 1/2 cups peeled, chopped cooking apples
    1 (16-ounce) jar applesauce
    1 tablespoon
    lemon juice
    2 tablespoons butter, chopped into small pieces

    Crunch Topping:
    3 tablespoons all-purpose flour
    1 tablespoon sugar
    Dash salt
    1 tablespoon butter, at room temperature

    Directions
    Preheat oven to 425 degrees F.Line a 9-inch pie pan with half of dough. Combine sugar, flour, cinnamon, and salt in a bowl. Stir in apples, applesauce, and lemon juice. Spoon apple mixture into pie pan and dot with butter. Cut remaining crust into strips; arrange in a lattice design over top of pie. For crunch topping, combine flour, sugar, and salt in a bowl. Using a fork, cut in butter until mixture is crumbly. Sprinkle over top of crust. Bake for 10 minutes, then reduce heat to 350 degrees F and continue to bake for about 45 minutes, or until crust and topping are golden brown.


    The Best Pizza in New York City!

    My friend Jen and I were born only a couple days apart. For this alone, we have a "Birthday Season" that quite literally lasts for about a month. As part of this adventure to celebrate the big 2-5, we spent a fabulous weekend in New York City.

    After an awesome night out, we stumbled upon a great pizza joint called Bleeker Street Pizza that was voted the Best Pizza by The Food Network. It's located on Seventh Avenue South at the corner of Bleecker Street in Manhattan's West Village. On a previous trip there, I went on a food tour that said it was the combination of the NY water, special dough and the thinness of the crust that really makes the difference. I'm not one to give any slice of pizza the side eye - and this one was DAMN good. And cheap, to boot! Both the line out the door, and our content faces should be an indictator of that. Check out Jen in her moment of utter bliss!


    Monday, January 18, 2010

    Good Food, Good Friends, Good Times!

    This blog is an outlet to share some of the tasty creations that come out of my kitchen, as well as the lessons I've learned along the way. Expect to see some yummy recipes, reviews of restaurants, fun shopping finds, and lots of personal photos of friends and family doing what they do best - eating!

    Case and point - the lovely ladies enjoying multiple variations of red velvet cakes - yum yum!